Background
This tutorial utilizes several AWS services. I won't be covering each of them in detail but here's a high level on what they do and what we'll be leveraging them for today:
- IAM: The Identity and Access Management service allows us to create access policies and apply them to users and roles.
- CloudFront: is a global CDN (Content Delivery Network). In our use case Cloudfront is the first point of contact for browser requests accessing our application. It acts as a proxy, serving HTML content from an S3 bucket and proxying REST requests to API Gateway.
- API Gateway: API Gateway is a fully managed service for creating RESTful web services. In this example we'll define the RESTful method that will process our contact form and route those requests to a Lambda function for processing.
- Lambda: AWS Lambda let's you run code without managing servers. In our example we'll create a simple NodeJS function to process the data posted from our form and send it to email using the SES service.
- SES: AWS SES is a fully managed email service. We'll use it to send our team an email when someone posts our contact form.
- S3: S3 is a fully-managed redundant object store. We'll use it to store our HTML, CSS and javascript files that make up the contact form.
- Route53: Route53 is a DNS web service. We'll use it to configure the DNS record that associates our domain to Cloudfront.
Step 1: Create an SES domain
I won't be covering how to setup an SES domain today but your can read the docs on Amazon Workmail or AWS SES and be up and running in minutes. For codeengine.com I'm using Amazon Workmail so SES is pre-provisioned as part of the setup wizard.
Step 2: Create an IAM Policy for SES
First we'll create an IAM policy and service role that will allow our AWS Lambda function to send emails using SES.
Log into IAM and choose "Policies", then choose "Create Your Own Policy".
Name it something descriptive so you know that the purpose of the policy is to allow sending email to your domain using SES.
In my account I named the policy SESSendCodeEngine. Add the following policy JSON, replacing my ARN with your SES domain ARN:
{
    "Version": "2012-10-17",
    "Statement": [
        {
            "Sid": "Stmt1483360101000",
            "Effect": "Allow",
            "Action": [
                "ses:SendEmail"
            ],
            "Resource": [
                "arn:aws:ses:us-east-1:599999999999:identity/codeengine.com"
            ]
        }
    ]
}
This IAM Policy allows the ses:SendEmail privilege for the domain "codeengine.com". Precisely defining policies for your Lambda function service roles that allow exactly the access to services required will help in keeping your application secure. As a best practice, always avoid blanket policies such as unlimited SES access.
Step 3: Create a Service Role for our Lambda function
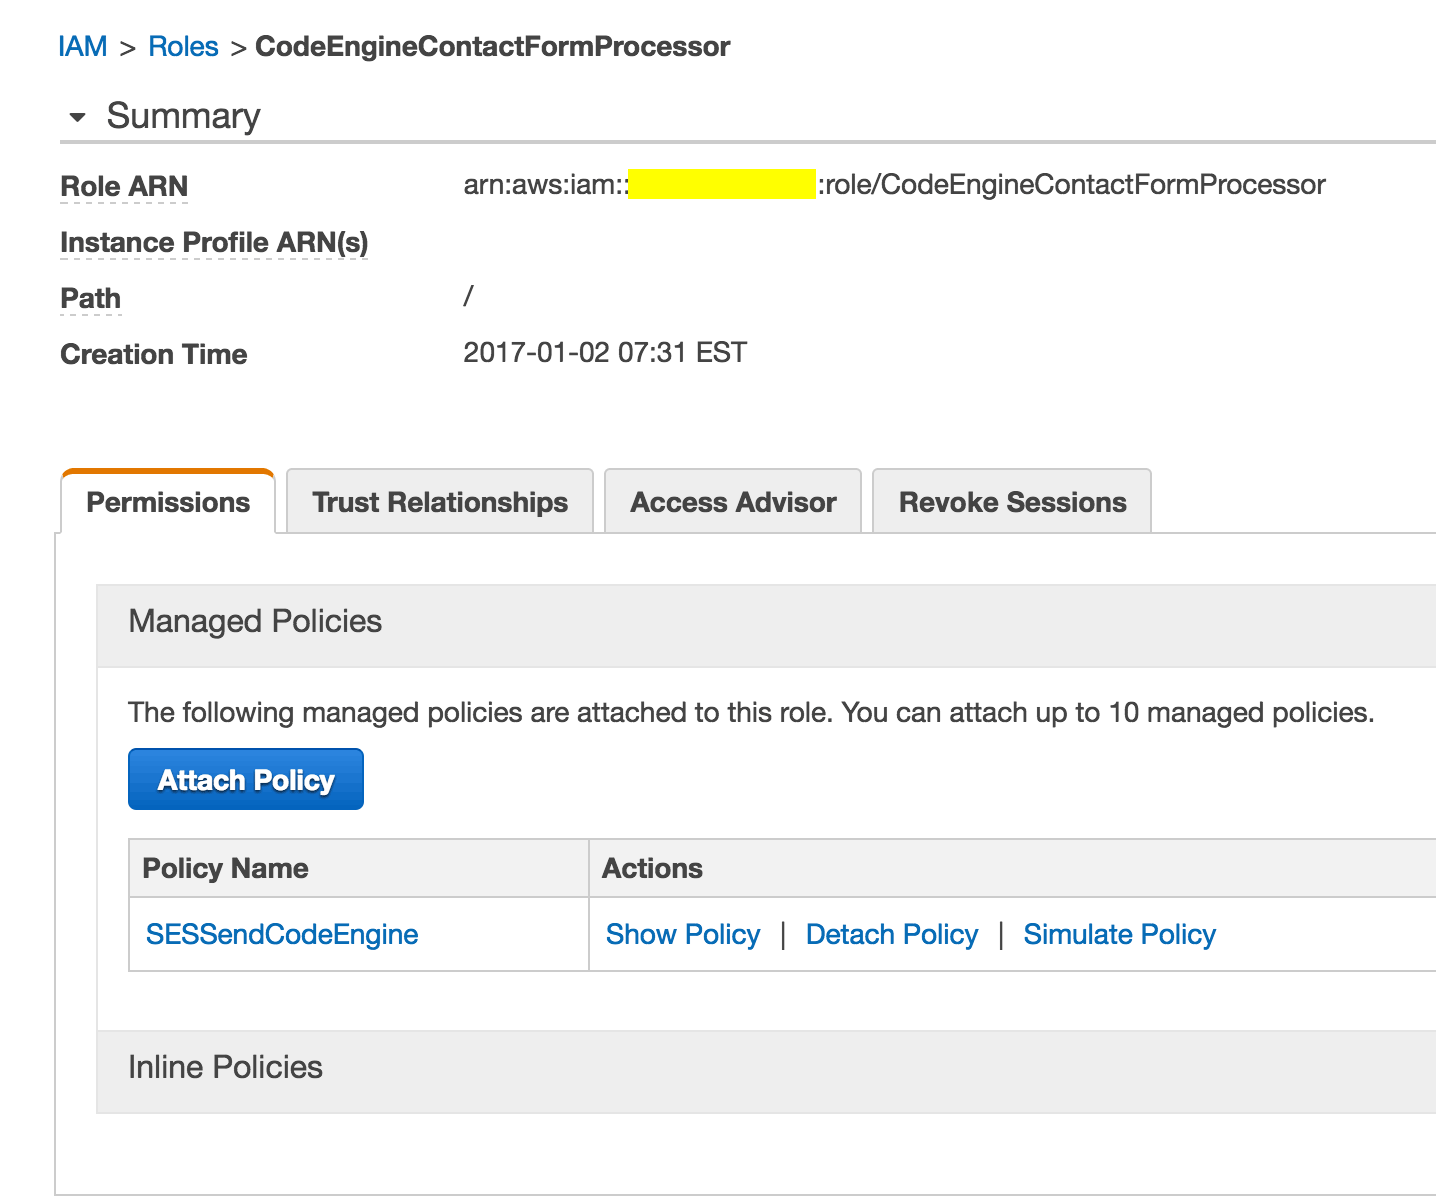
Log into IAM and choose "Roles", then choose "Create New Role".
Name your role something specific so that you know exactly what it's for.
I named mine CodeEngineContactFormProcessor.
Once you've selected a name click on "Next Step".
In the "Select Role Type" menu choose "AWS Lambda".
In the "Attach Policy" menu select the IAM policy that you created in Step 2 above.
Step 4: Create the Lambda Function
From the main Lambda menu choose "Create a Lambda function".
In the "Select Blueprint" menu choose "Blank Function".
In the "Configure Triggers" menu simply choose "Next" (we'll configure the integration with API Gateway later).
Give your function a descriptive name. In my case I named it processCodeEngineContactForm.
We'll be using the NodeJS 4.3 runtime and pasting our code inline for this simple example.
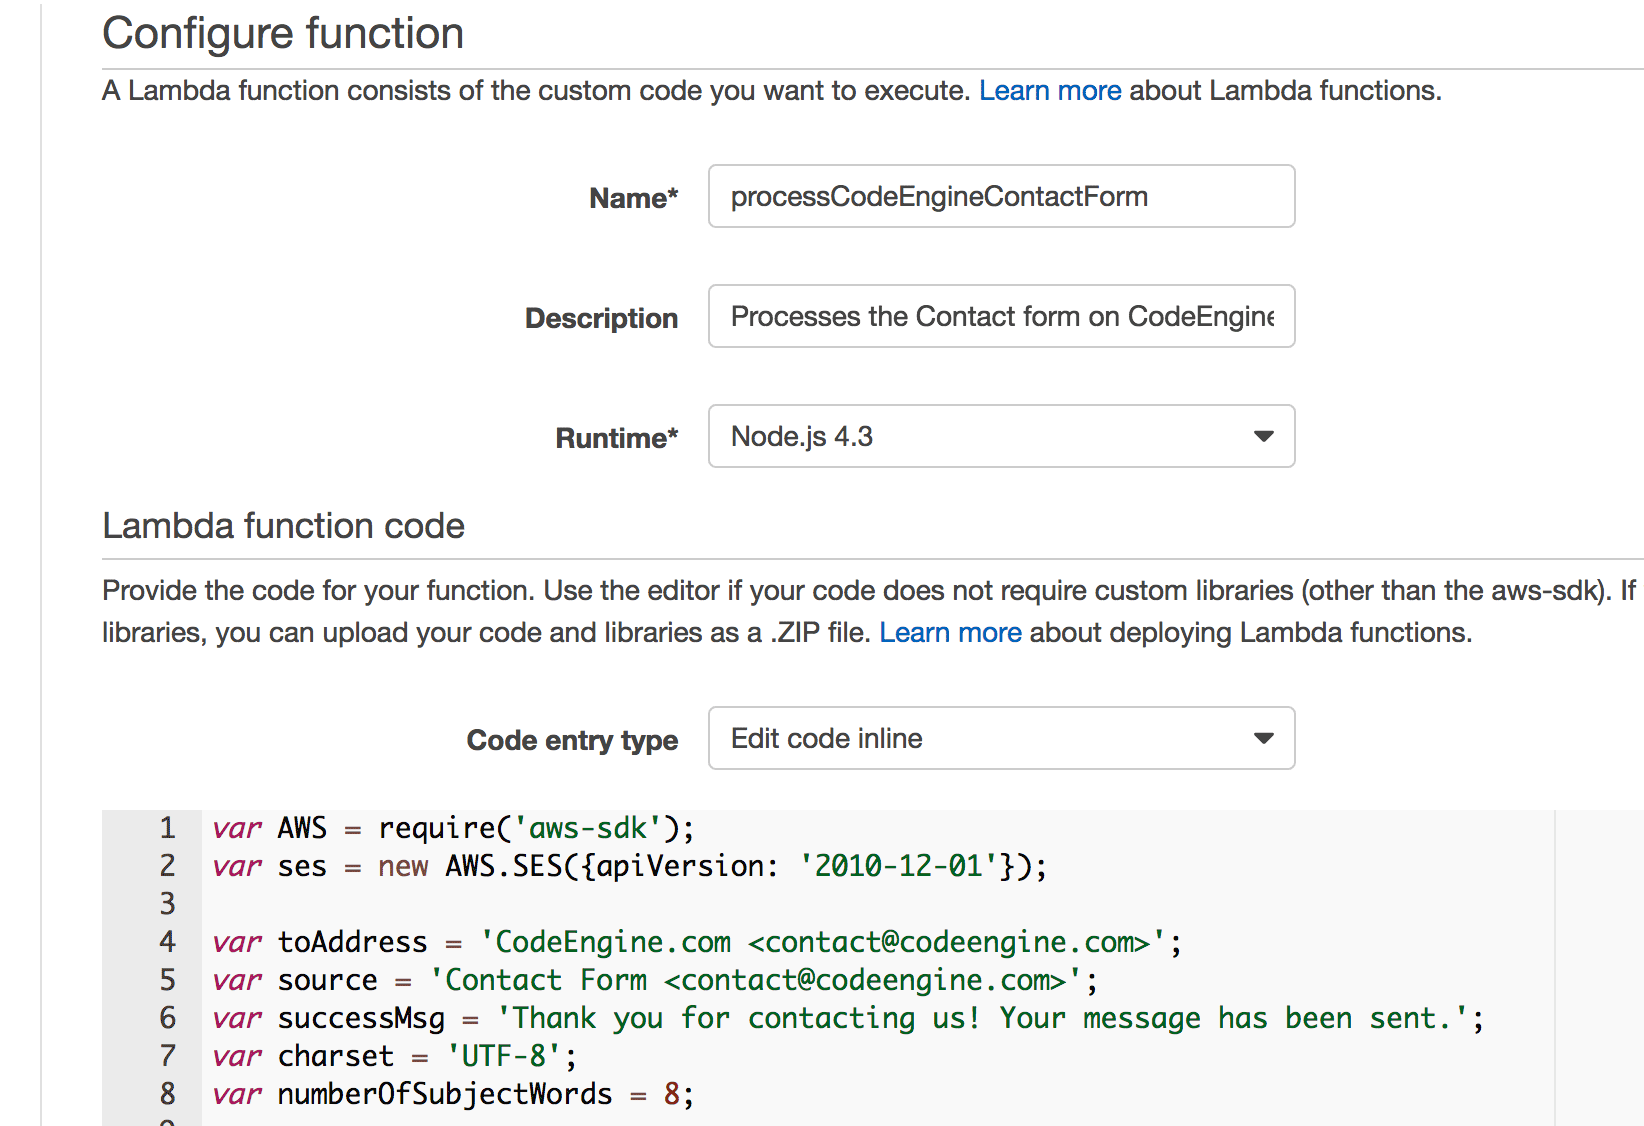
Copy and paste the following code into the function body, customizing the values for your form and your domain:
var toAddress = 'CodeEngine.com <contact@codeengine.com>'; var source = 'Contact Form <contact@codeengine.com>'; var successMsg = 'Thank you for contacting us! Your message has been sent.'; var charset = 'UTF-8'; var numberOfSubjectWords = 8;
var validateEmail = function (email) { if (!validateFormValue(email, true, 255)) return false; var emailRegex = /^(([^<>()[]\.,;:\s@"]+(.[^<>()[]\.,;:\s@"]+)*)|(".+"))@(([[0-9]{1,3}.[0-9]{1,3}.[0-9]{1,3}.[0-9]{1,3}])|(([a-zA-Z-0-9]+.)+[a-zA-Z]{2,}))$/; if (!emailRegex.test(email)) return false; return true; }
var validateFormValue = function (value, required, maxLength) { required = typeof required !== 'undefined' ? required : true; maxLength = typeof maxLength !== 'undefined' ? maxLength : 255; if (required && !value) return false; if (value.length > maxLength) return false; return true; }
exports.handler = function (data, context) { var email = data.email; var name = data.name; var phone = data.phone; var message = data.message;
if (!validateEmail(email)) {
    context.fail('Email is invalid.');
    return;
}

if (!validateFormValue(name, true, 100)) {
    context.fail('Name is invalid.');
    return;
}

if (!validateFormValue(phone, true, 20)) {
    context.fail('Phone is invalid.');
    return;
}

if (!validateFormValue(message, true, 1024)) {
    context.fail('Message is invalid.');
    return;
}

var replyTo = data.name + " <" + email + ">";
var emailData = [];
emailData.push("Name: " + data.name);
emailData.push("Phone: " + data.phone);
emailData.push("Message: " + data.message);

// subject will be the first numberOfSubjectWords words from the message
var subject = message.replace(/\s+/g, ' ').split(' ').slice(0, numberOfSubjectWords).join(' ');

ses.sendEmail({
    Destination: {ToAddresses: [toAddress]},
    Message: {
        Body: {Text: {Data: emailData.join("\r\n"), Charset: charset}},
        Subject: {Data: subject, Charset: charset}
    },
    Source: source,
    ReplyToAddresses: [replyTo]
}, function (err, data) {
    if (err) {
        console.log(err, err.stack);
        context.fail(err);
        return;
    }

    console.log(data);
    context.succeed({'successMsg': successMsg});
});
};
In "Lambda function handler and role" select the service role we created in Step 3 above.

Accept the defaults for all the other settings. On the "Review" step verify your settings and then click "Create Function".
Next click on "Test" and verify that an email is sent when the function runs. You'll need to customize the values to mirror the elements on your form.
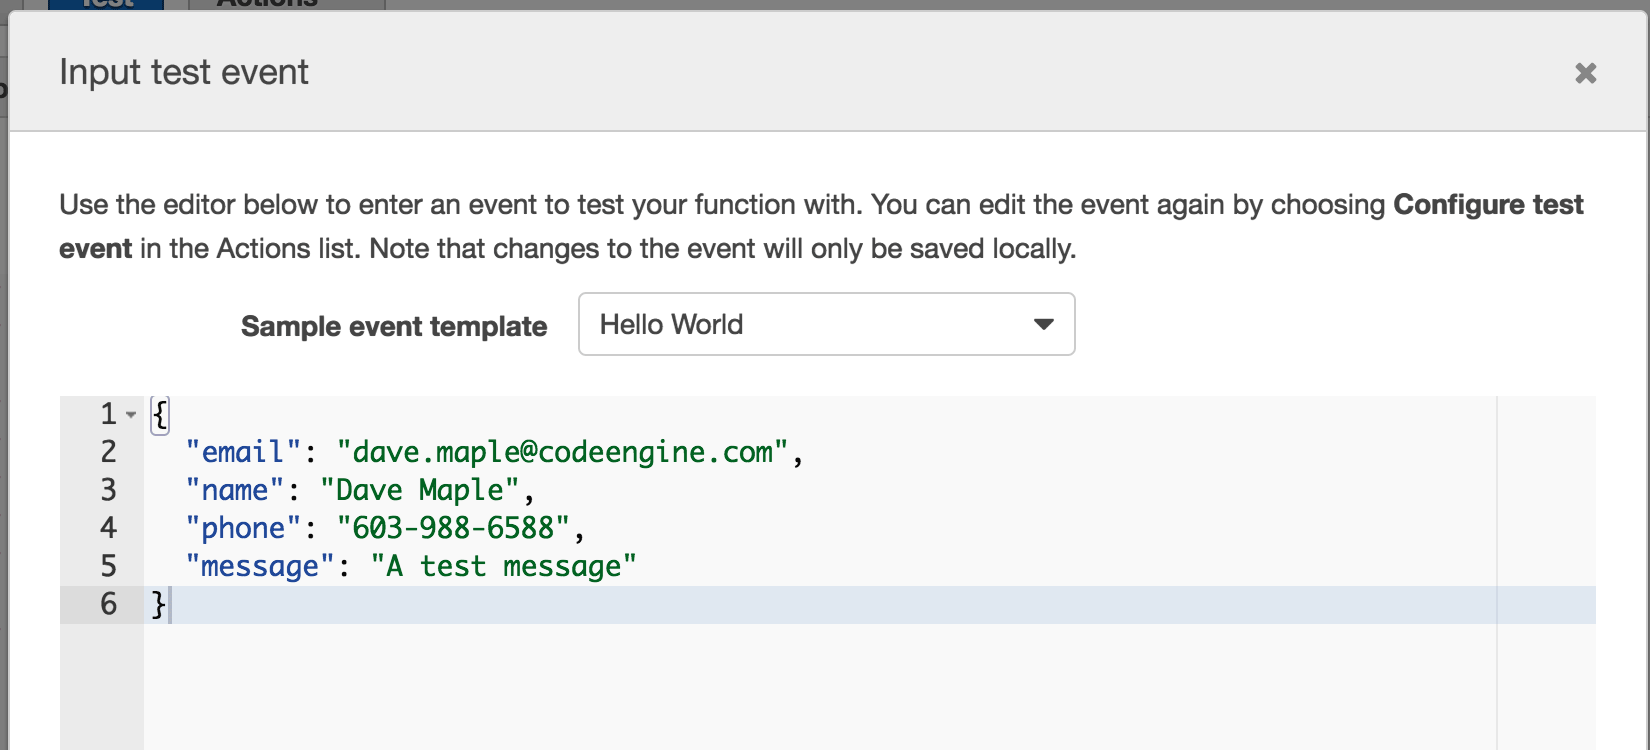
If everything is setup correctly you should get the email from this test event.
Step 5: Configure API Gateway
From the API Gateway main menu select "Create new API". Give your API a descriptive name. In my example I'm naming mine "CodeEngine.com REST API". From the "Actions" menu select "Create Resource". Name the resource "rest" and then click "Create Resource".
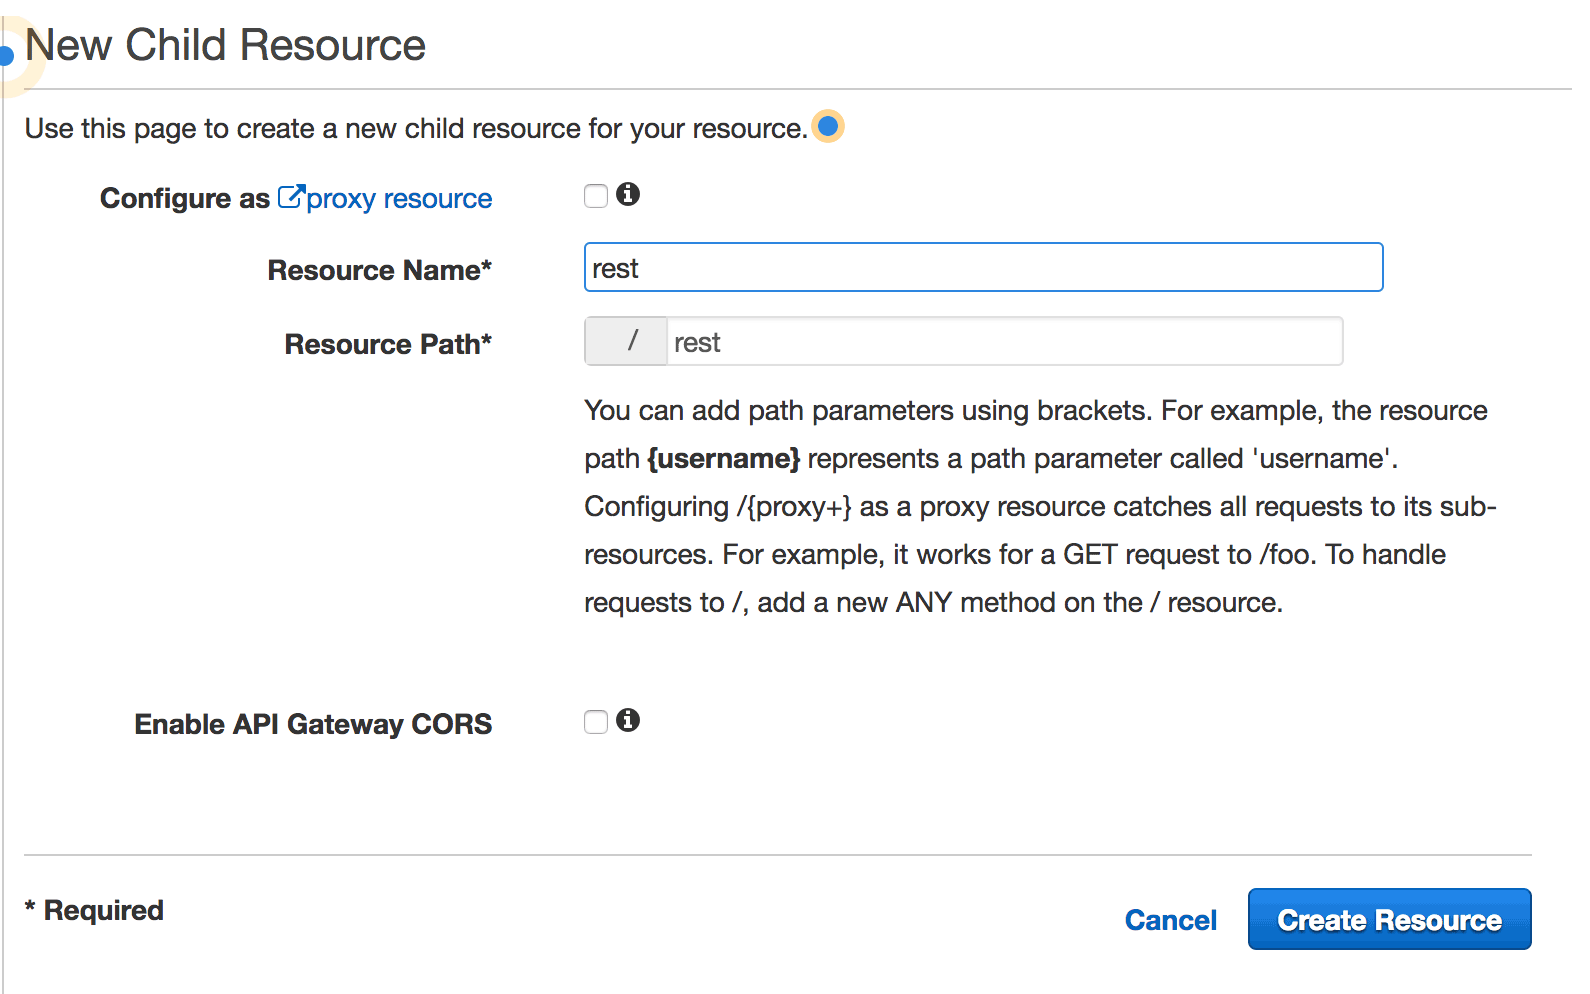
From the "Actions" menu select "Create Resource" again. Name the resource "contact".

From the "Actions" menu select "Create Method". In the Method dropdown that appears select "POST" as the HTTP method and then tick the checkmark next to it.

In the "Setup" step select "Lambda Function" as the integration type, choose your region and then start typing the name of the Lambda function we defined in Step 4 above.
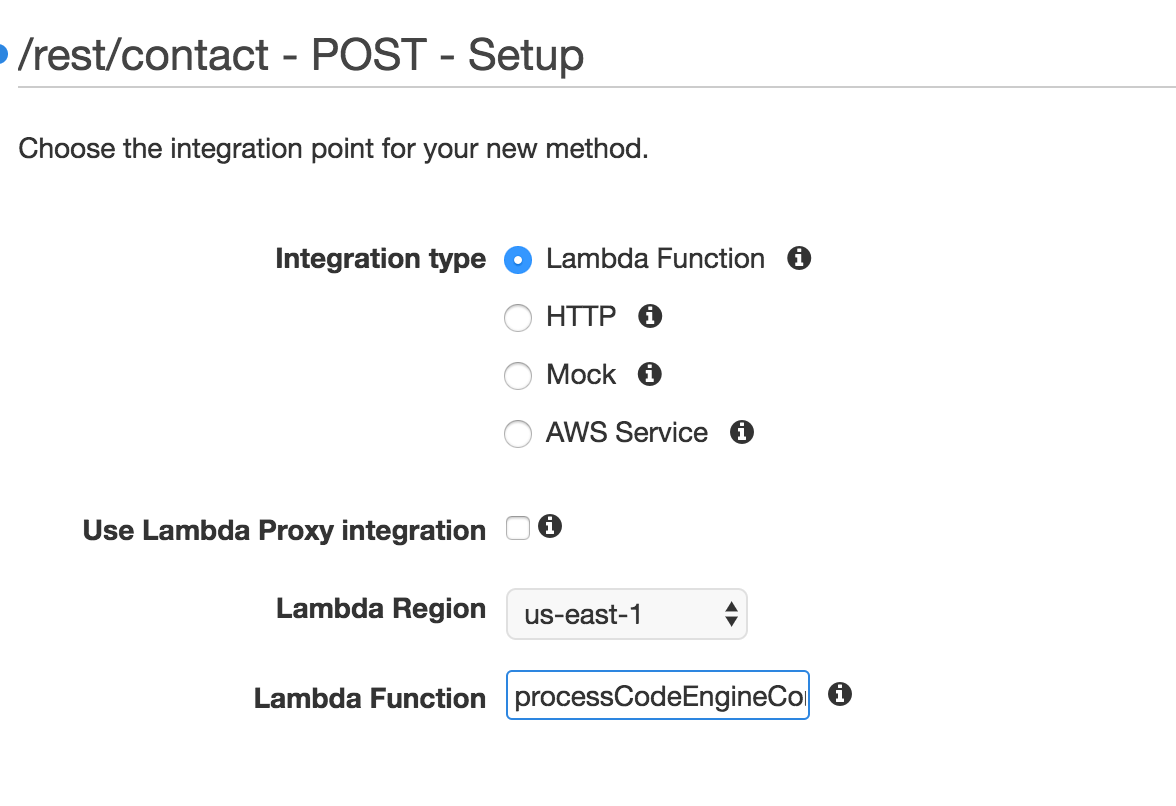
Click on "Save" to finalize the method creation. A window will popup explaining that "You are about to give API Gateway permission to invoke your Lambda function". Click on "OK".
Click on the lightning bolt that says "Test". Enter a request body mirroring the keys from JSON event we tested in Step 4 above:
{
  "email": "test@davemaple.com",
  "phone": "603-988-6588",
  "name": "Dave Maple",
  "message": "A test message"
}
Then click on "Test". You should receive the email just like before and you should see output similar to the following:
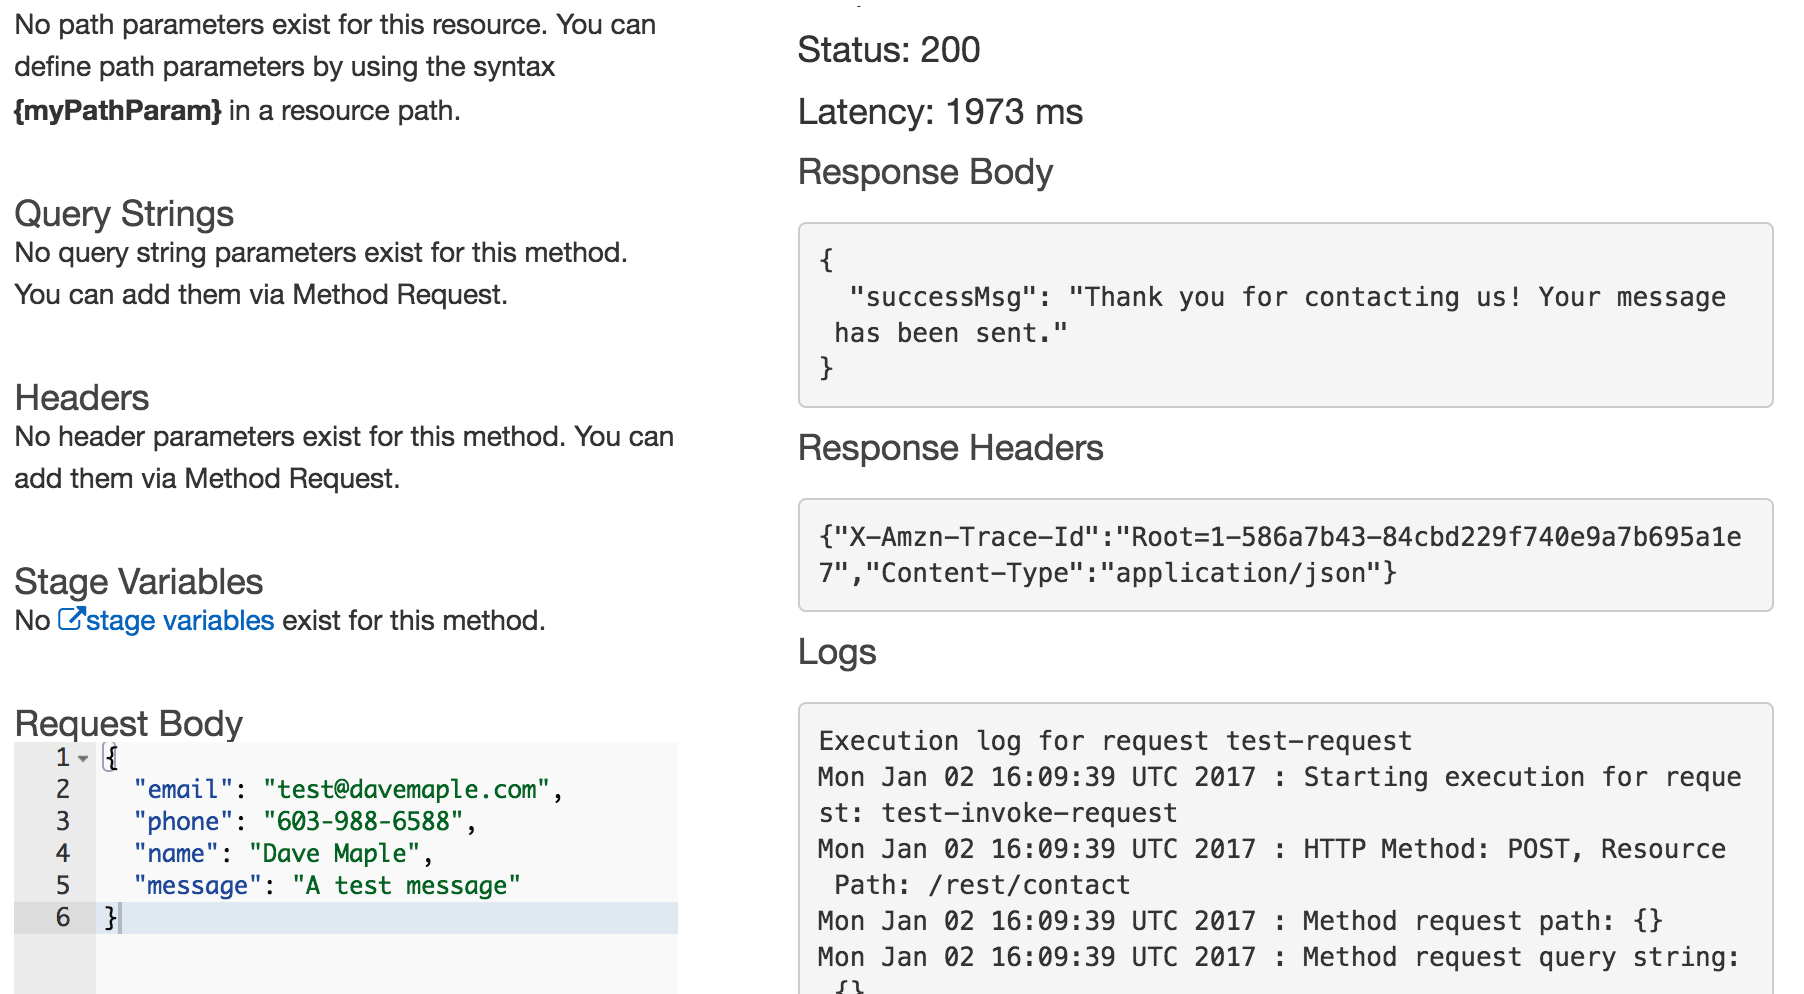
Finally we'll deploy our API. From the "Actions" menu select "Deploy API". Let's name this stage "prod" -- you can fill in the optional fields as well.
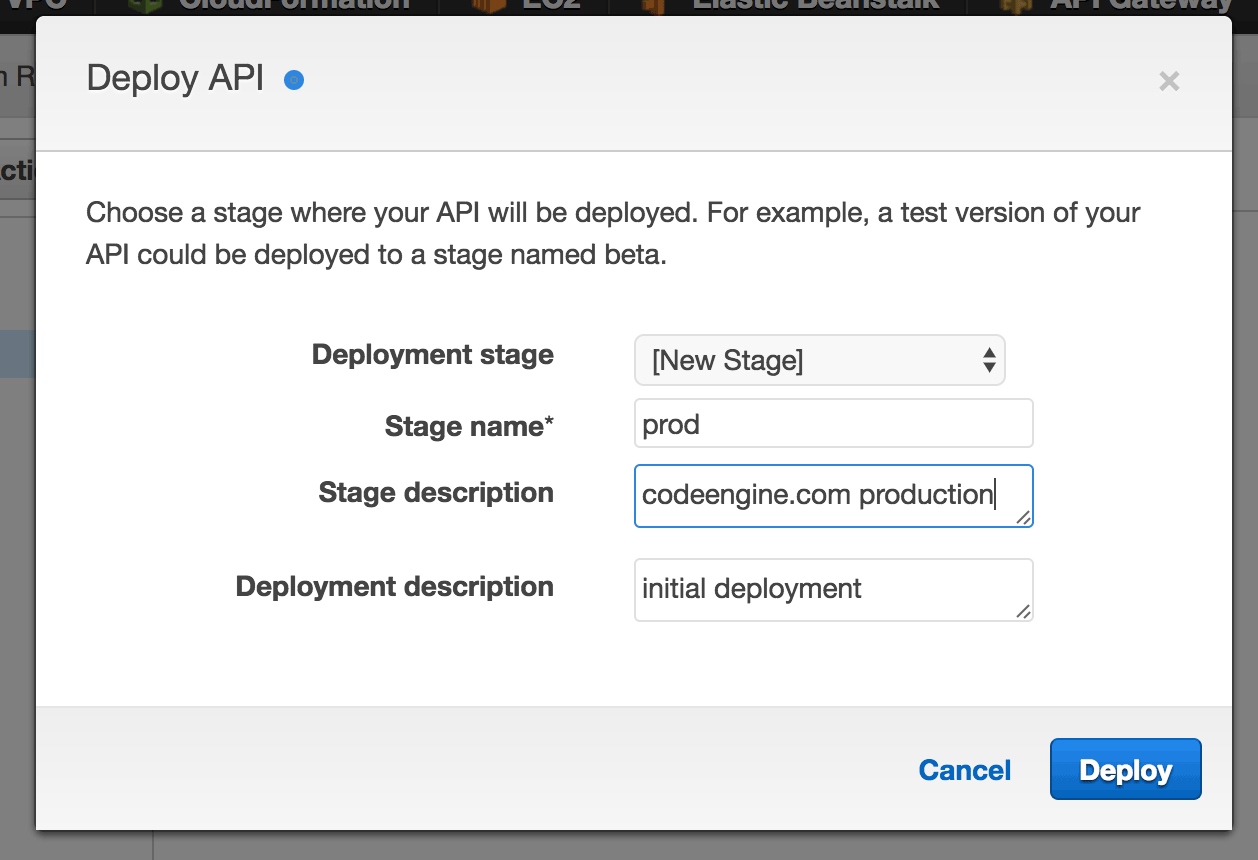
API gateway will create a random subdomain for your API and will append the stage as a path at the end, for example, https://z8obwrwoha.execute-api.us-east-1.amazonaws.com/prod.
Make note of the domain name and path as we'll need them to work with Cloudfront in Step 6 below.
Step 6: Create Contact Form in S3
I'm not going to cover how to create an HTML contact form today nor will I be covering how to get your HTML into an S3 bucket.
I'm just going to assume that you've created your form and that when the user presses the submit button the form will be Serialized to JSON
and POSTed to /rest/contact.
There are a bazillion great tutorials if you need a hand with this.
Personally I use Jekyll to create my HTML and s3_website to upload my content to my bucket but there are many other tools and workflows to accomplish this.
You can see my HTML contact form here -- nothing too fancy.
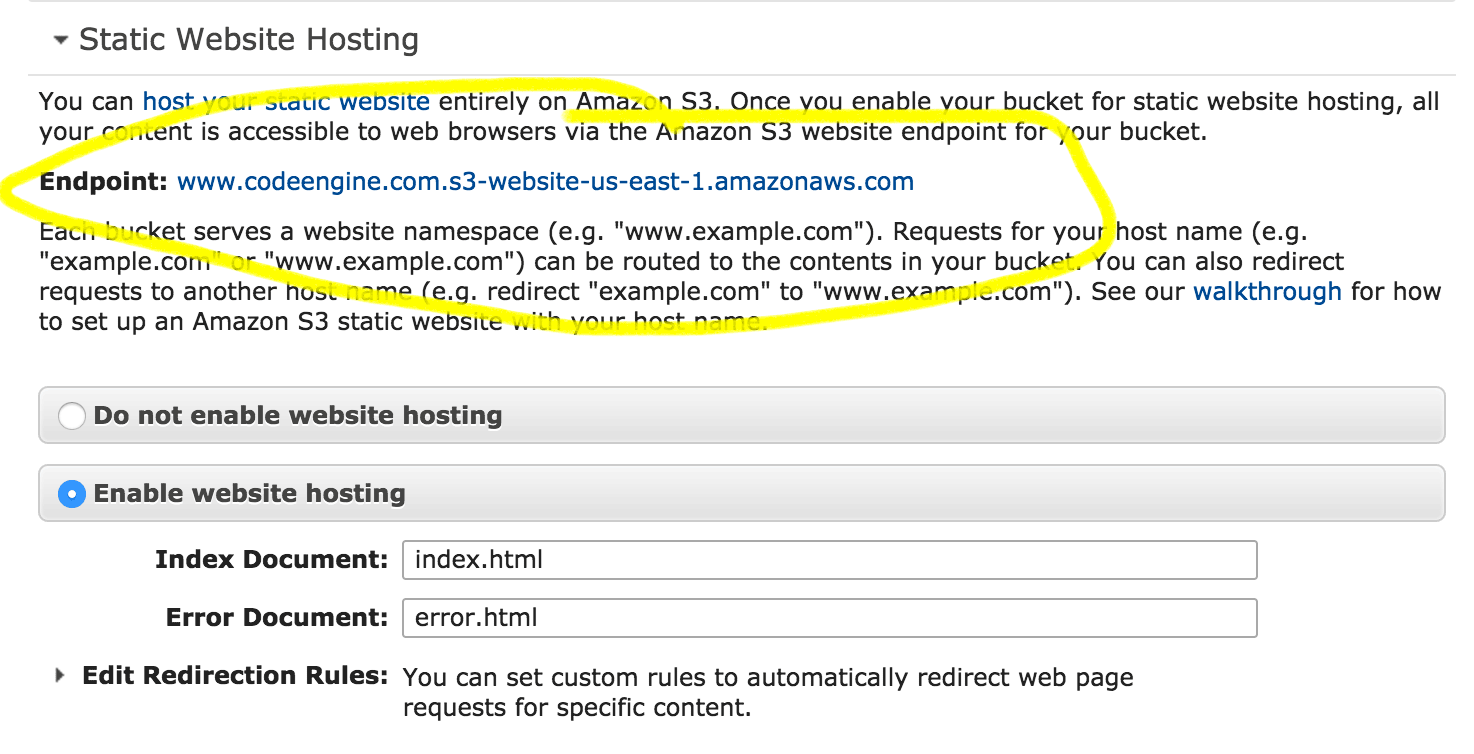
You will also need to configure your S3 bucket for static website hosting before proceeding to Step 7.
Javascript excerpt/pseudocode:
$.ajax({
    url: "/rest/contact/",
    type: "POST",
    contentType: "application/json; charset=utf-8",
    dataType: "json",
    data: JSON.stringify({
        name: name,
        phone: phone,
        email: email,
        message: message
    }),
    cache: false,
    success: function (response) {
        if (response.errorMessage) {
            this.error(response.errorMessage);
            return;
        }

        // process success message
    },
    error: function (msg) {
        // process errors
    }
});
Step 7: Configure Cloudfront
We're going to use Cloudfront to to serve content from 2 different origins.
I'm using www.codeengine.com as my example since this is how the site you're on is served up.
The HTML contact form and javascript to process it will be served from an S3 bucket.
The processing of the form will be forwarded to API Gateway.
We'll use a convention that anything under the path /rest/ will come from API Gateway.
The default behavior will be to serve any other requests from our S3 bucket.
From the main Cloudfront menu select "Get Started" under "Web". Cloudfront will want us to configure the default origin as part of the setup wizard. Our default will be our S3 bucket hosting. In Origin domain name enter the "Endpoint" found in your S3 bucket under "Static Website Hosting" as in my example here:
I won't cover all of the Cloudfront configuration settings. I typically redirect all requests to HTTPS, turn off forwarding headers, allow the origin to specify cache behaviors, use only US, Canada and Europe price class, use SNI and use a custom SSL certificate from AWS Certificate Manager.
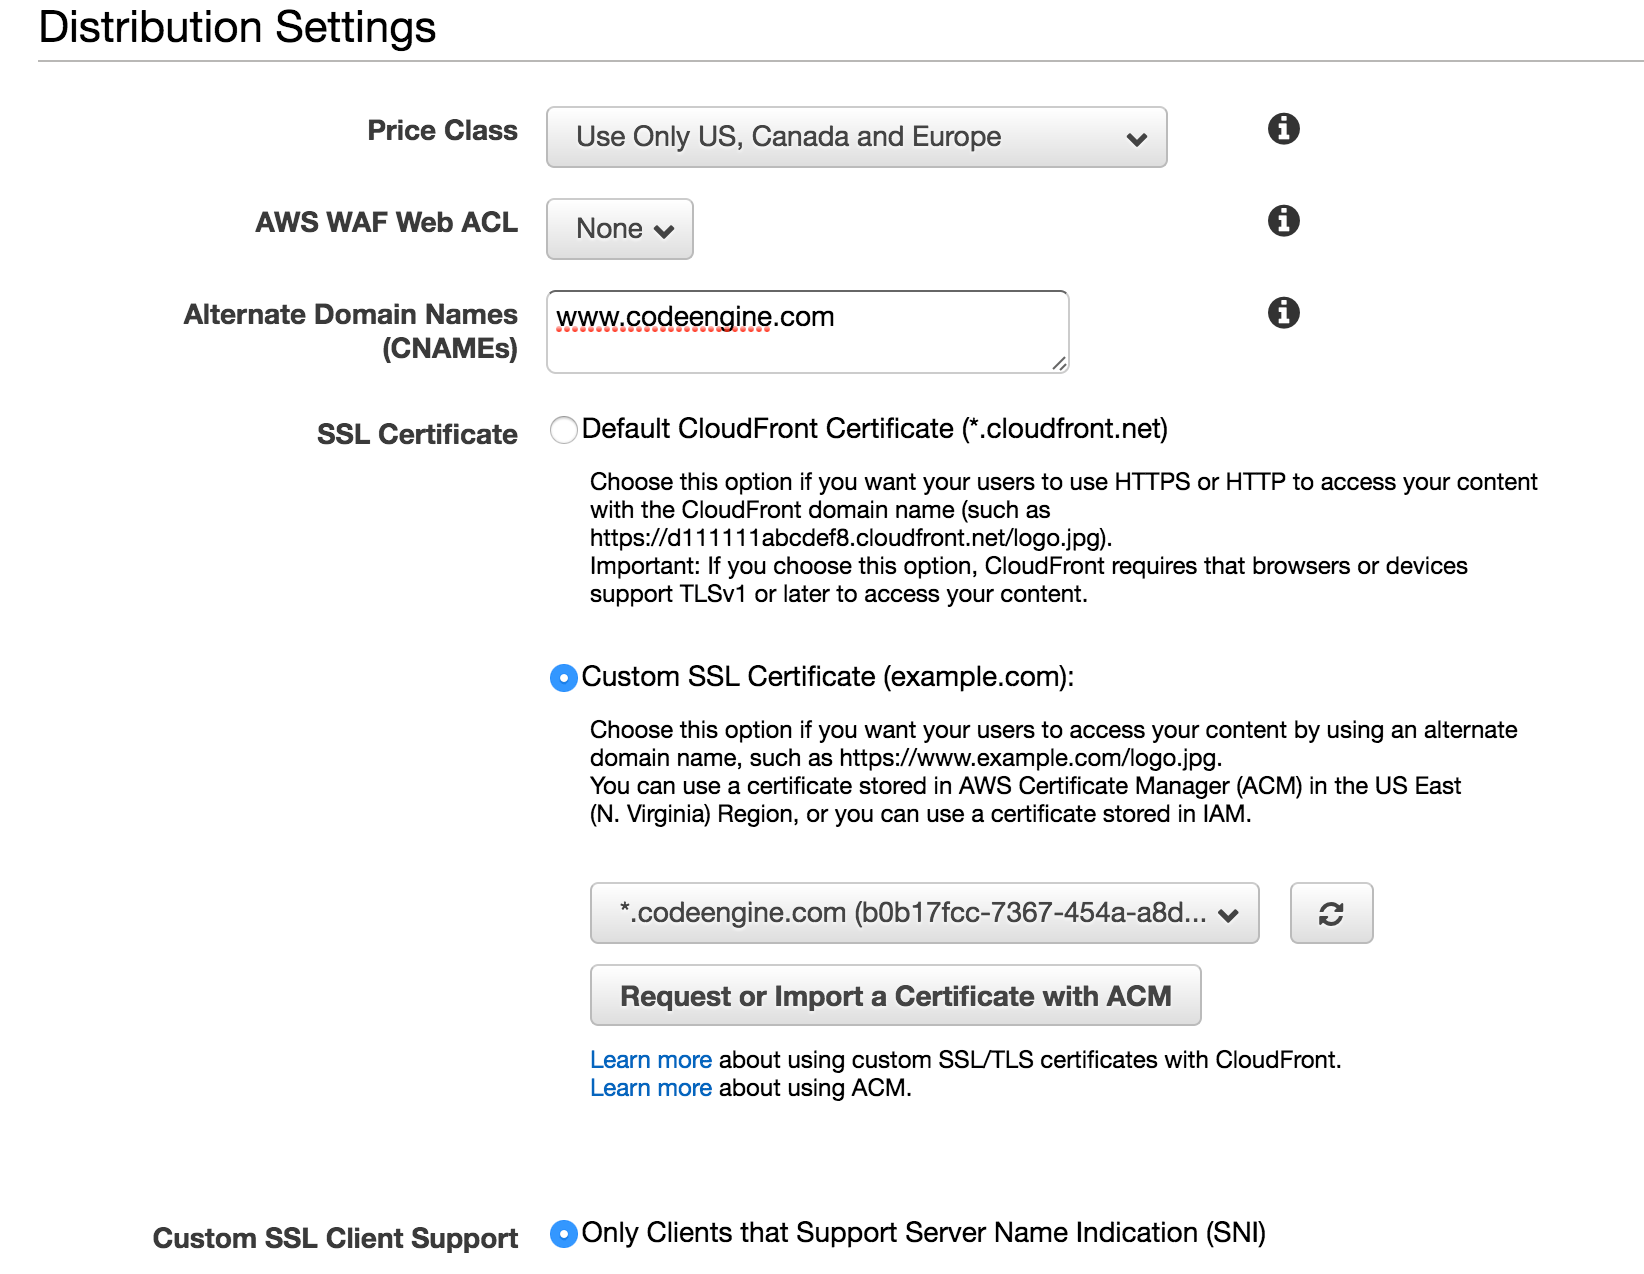
Make sure to add an alternate CNAME for the public domain you intend to host from. In this example I've added "www.codeengine.com" which is where this site is being served via Cloudfront.
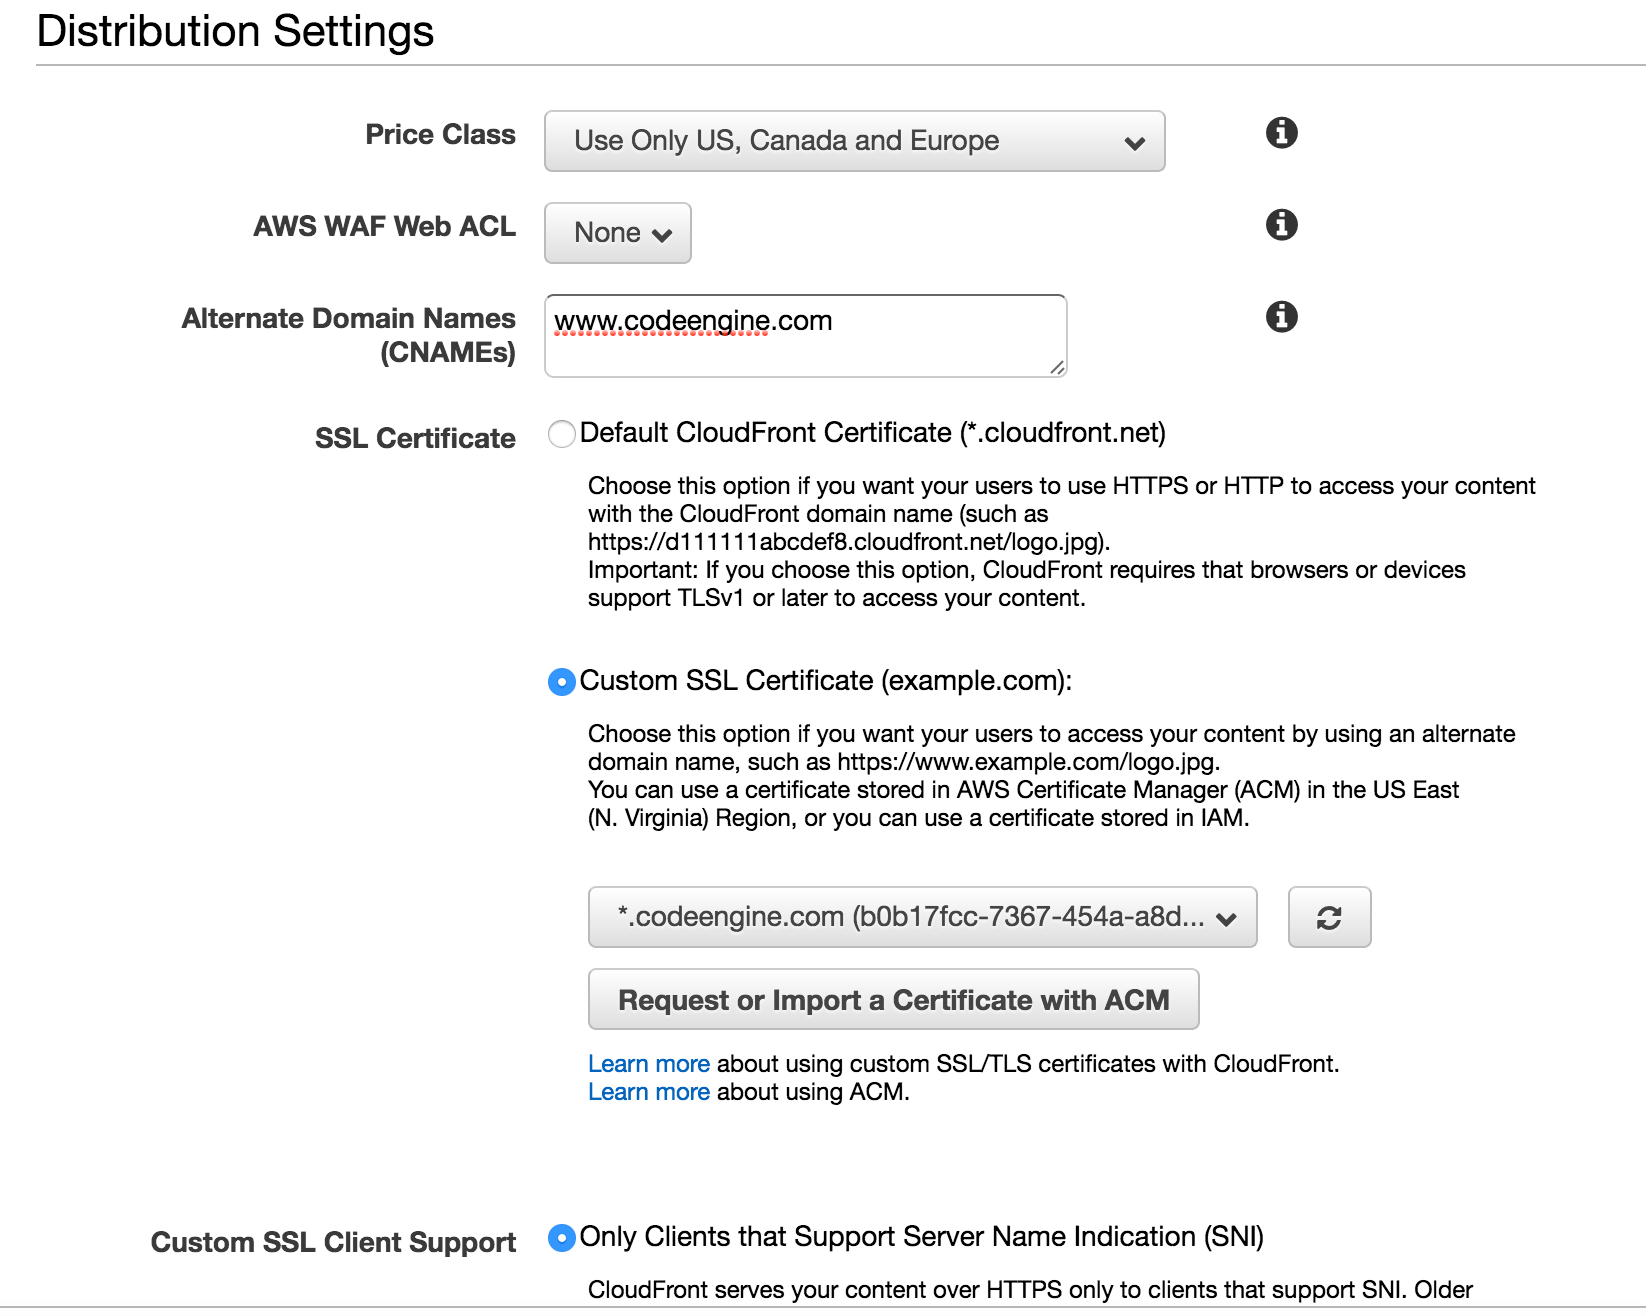
Cloudfront takes about 20 minutes to propagate changes. Be patient -- the results are worth the wait.
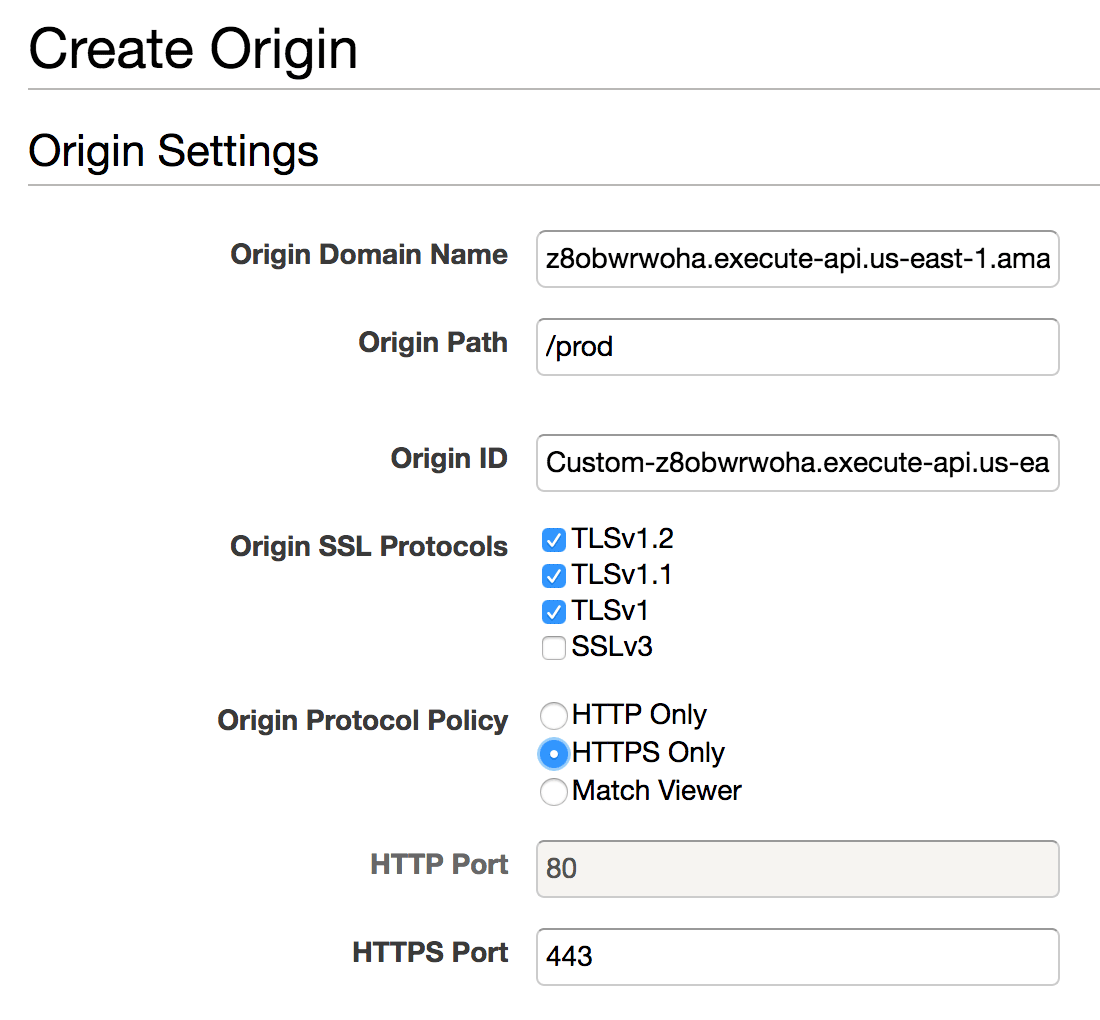
Next we'll add our second origin to serve REST requests from API Gateway. From the "Origins" tab select "Create Origin". Enter the domain name and path we saved in Step 5 and make sure to select "HTTPS only" for "Origin Protocol Policy".
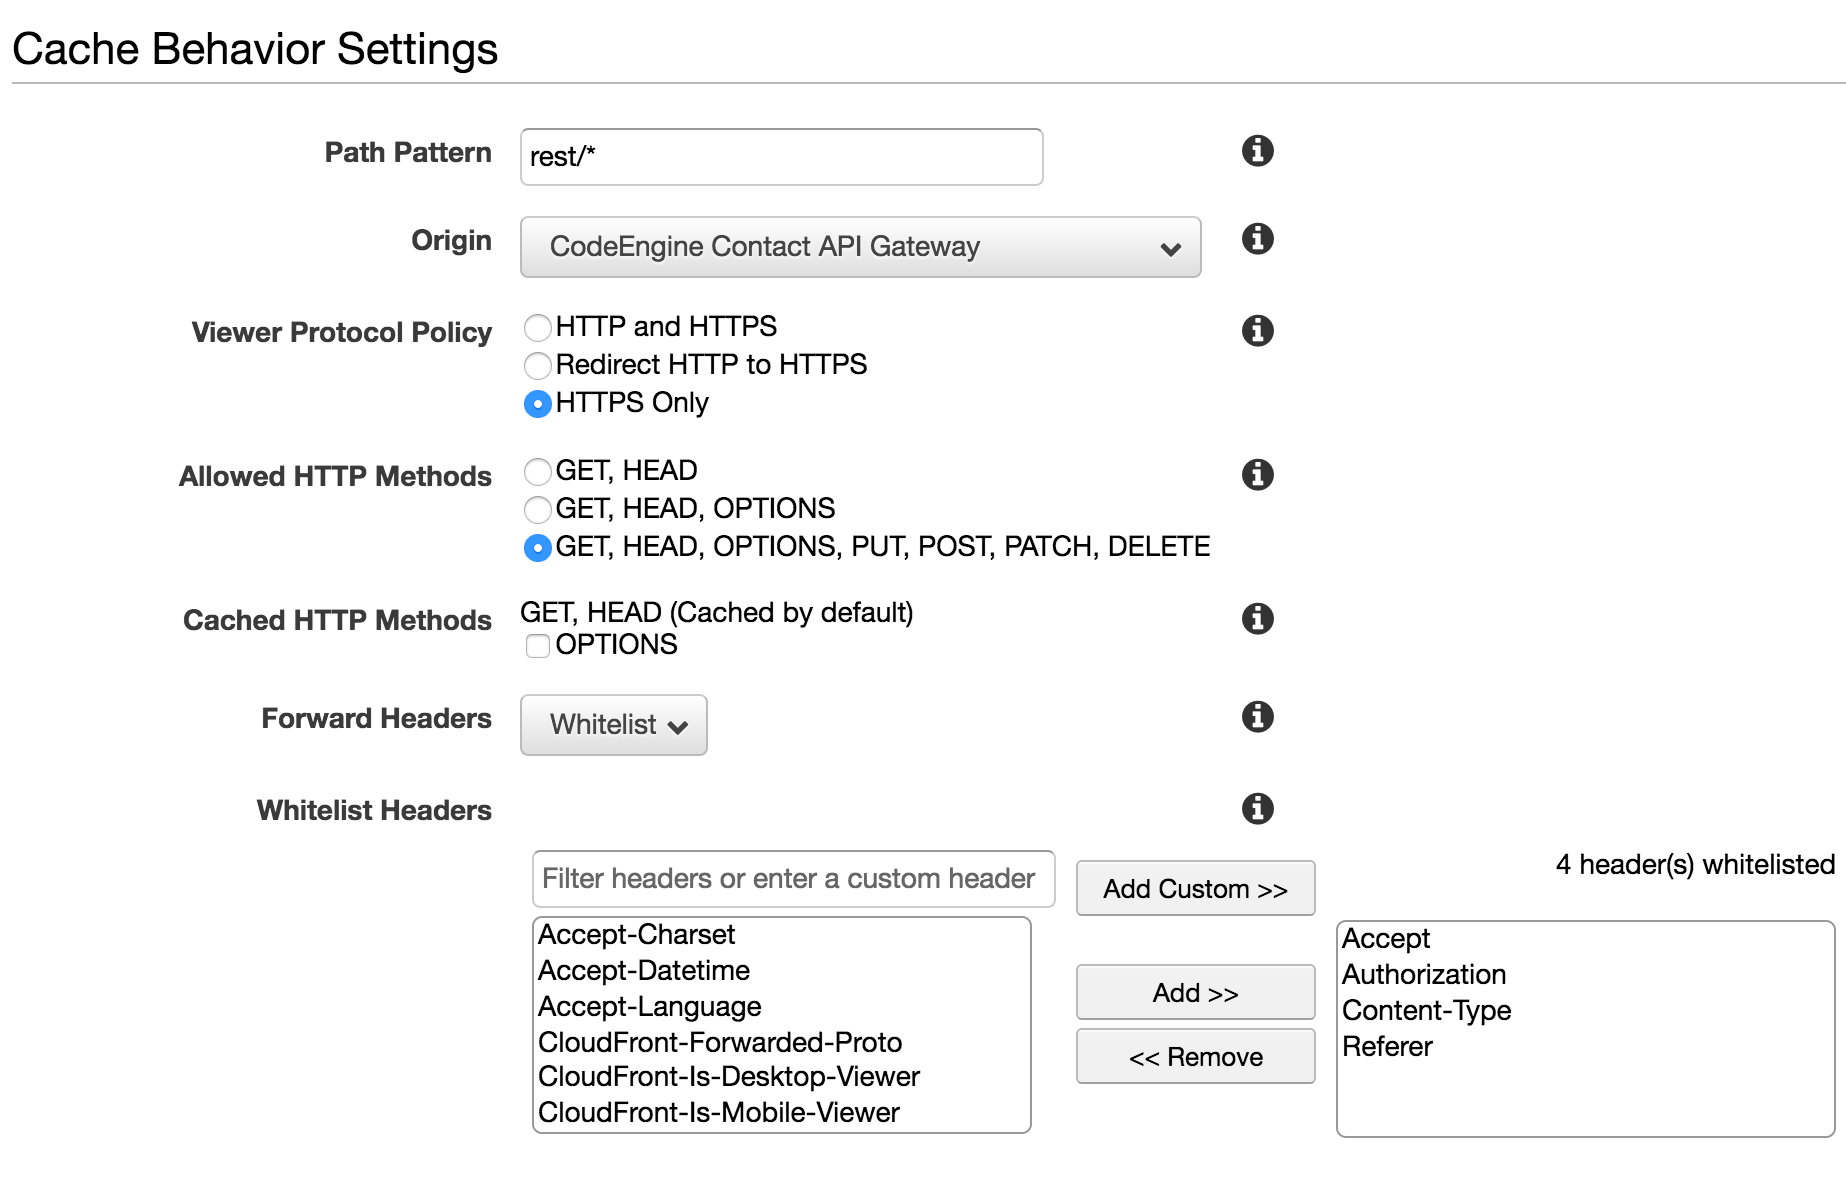
Next go to the "Behaviors" tab and click "Create Behavior". These settings are important as there are a few tricks required to get API Gateway working properly behind Cloudfront.
For "Path Pattern" we'll use rest/* which will catch any request starting with /rest such as https://www.codeengine.com/rest/contact or https://www.codeengine.com/rest/foo.
In the "Origin" dropdown select the Origin we just created for API Gateway.
For "Viewer Protocol Policy" select HTTPS only.
For "Forward Headers" select "Whitelist". We need to do this to prevent the Host Header from being passed through to the origin. Because API Gateway uses SNI passing the Host header borks things up. You can pass through whatever headers you think you'll be interested in receiving in API Gateway. Personally I'm passing through "Referer", "Accept", "Content-Type" and "Authorization".
For "Object Caching" select "Use Origin Cache Headers".
For "Forward Cookies" select "All".
For "Compress Objects Automatically" select "Yes" (this will gzip responses).
Save these settings and wait ~20 minutes at which point your distribution should be ready to use.
Step 8: Configure Route53
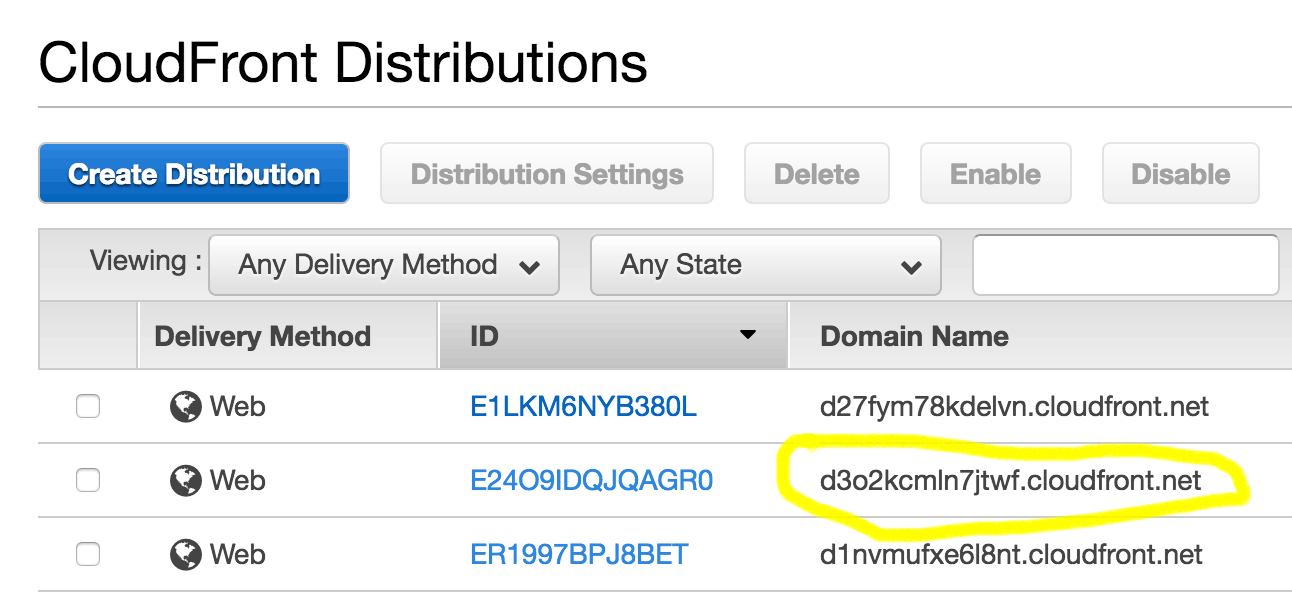
When you create a Cloudfront distribution a random CNAME is automatically assigned:
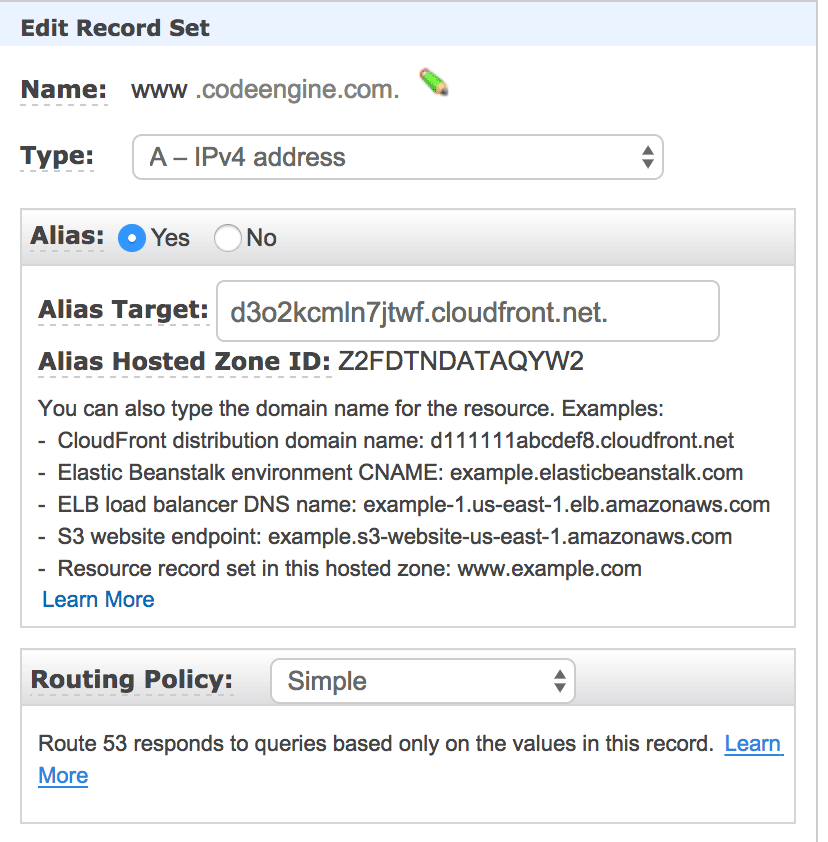
Now all we need to do is configure a DNS record in Route53 for www.codeengine.com to map it to this cloudfront CNAME. An A Alias record would work or you could use a CNAME record. Since Amazon Route 53 doesn't charge for alias queries to CloudFront distributions I would always opt for an A Alias record:
Uh ... Dave ... That all sounds complicated
There is some complexity involved but keep in mind that what we're achieving here in a matter of minutes is a nearly infinitely scalable serverless web stack -- all served from a single domain (thus avoiding CORS concerns). The cost of running a busy site with this architecture is very affordable and management is trivial once these pieces are in place.
Also remember -- if we were going to do this 10 times a day it's all automatable through the API or Cloudformation templates.
Closing Thoughts
If you're brave and patient enough to follow the tutorial in your own account I'd love to hear back from you on what you liked and what could be more clear.
Thank you and happy cloud computing!
comments powered by Disqus